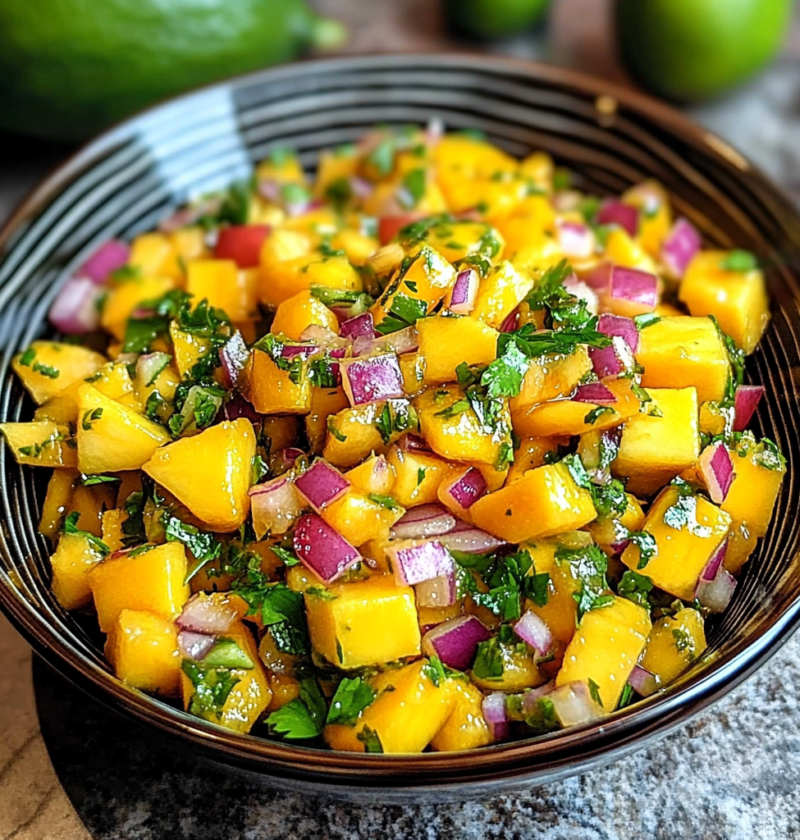
The Best Mango Salsa Salad

The Best Mango Salsa Salad

Introduction

Imagine a burst of tropical flavors in every bite – sweet, tangy, and refreshing. Mango salsa salad is a delightful combination of juicy mangoes, crisp vegetables, and zesty lime dressing. Whether you’re looking for a light appetizer or a vibrant side dish, this recipe is sure to impress your taste buds. In this article, we’ll explore the secrets to creating the best mango salsa salad and offer some tips to elevate your culinary skills.

Why You’ll Love This Recipe

There are several reasons why this mango salsa salad recipe is a must-try. First and foremost, it’s incredibly easy to make. With just a few simple ingredients, you can whip up a colorful and flavorful dish in no time. Additionally, this salad is a nutritional powerhouse. Mangoes are rich in vitamins A and C, while the vegetables provide a dose of fiber. It’s a guilt-free indulgence that will leave you feeling satisfied and nourished.

Ingredients

To prepare the best mango salsa salad, gather the following ingredients:

  • 2 ripe mangoes, diced
  • 1 red bell pepper, diced
  • 1/2 red onion, finely chopped
  • 1 jalapeno pepper, seeded and minced
  • 1/4 cup fresh cilantro, chopped
  • Juice of 1 lime
  • Salt and pepper to taste

Optional ingredient substitutions:

If you prefer a milder salsa, you can substitute the jalapeno pepper with a milder chili variety. Additionally, you can add a squeeze of orange juice for a hint of citrus sweetness.

Step-by-Step Instructions

  1. In a large bowl, combine the diced mangoes, red bell pepper, red onion, jalapeno pepper, and cilantro.
  2. In a separate small bowl, whisk together the lime juice, salt, and pepper.
  3. Pour the dressing over the mango mixture and gently toss to combine.
  4. Allow the flavors to meld together by refrigerating the salsa for at least 30 minutes before serving.
  5. Once chilled, give the salsa a final stir and taste for seasoning. Adjust the salt, pepper, or lime juice if needed.

Pro tips for success:

When selecting mangoes, choose ripe ones that give slightly when gently squeezed. This ensures the sweetest and juiciest fruit for your salsa. Additionally, be sure to dice the ingredients into uniform size for a visually appealing presentation.

Variations and Substitutions

While the classic mango salsa salad is already a winner, there are endless ways to customize it based on your preferences. Here are a few variations and substitutions you can try:

– Add a touch of heat with a sprinkle of cayenne pepper.

– Incorporate some crunch with diced cucumber or jicama.

– For a tropical twist, mix in some fresh pineapple or papaya.

– Swap the cilantro for fresh mint leaves for a refreshing flavor.

– If you’re not a fan of onions, substitute them with thinly sliced green onions.

Serving Suggestions

Mango salsa salad is a versatile dish that pairs well with various meals. Here are a few serving suggestions to inspire you:

– Serve it as a salsa with tortilla chips for a tasty appetizer.

– Spoon it over grilled chicken or fish for a burst of flavor.

– Use it as a topping for tacos or quesadillas to add a tropical flair.

– Enjoy it as a refreshing side dish alongside grilled meats or barbecue.

– Toss it with mixed greens for a vibrant salad.

FAQs

Q: How long can I store mango salsa salad?

A: Mango salsa salad is best enjoyed fresh, but you can store it in the refrigerator for up to two days. Keep in mind that the texture may change slightly as the ingredients soften.

Q: Can I use frozen mangoes?

A: While fresh mangoes are recommended for the best flavor and texture, you can use frozen mangoes if fresh ones are not available. Thaw them before dicing and pat them dry to remove any excess moisture.

Q: Can I make the salsa in advance?

A: Yes, you can prepare the mango salsa ahead of time. However, it is best to add the dressing just before serving to prevent the salad from becoming too watery.

Final Thoughts

As you take a bite of the best mango salsa salad, you’ll be transported to a tropical paradise. The combination of sweet mangoes, crunchy vegetables, and zesty lime dressing is simply irresistible. Whether you’re hosting a summer gathering or simply craving a burst of freshness, this recipe is a winner. So grab your knife, embrace the vibrant colors, and let your taste buds dance with joy. Don’t forget to share your mango salsa salad experience with us!

The Best Mango Salsa Salad

The Best Mango Salsa Salad

Recipe by Author

A delightful combination of juicy mangoes, crisp vegetables, and zesty lime dressing, this mango salsa salad offers a burst of tropical flavors in every bite. Perfect as a light appetizer or a vibrant side dish, it is easy to make and a nutritional powerhouse rich in vitamins and fiber.

Course: Salad Cuisine: International Difficulty: easy
4.5 from 120 votes
🍽️
Servings
4
⏱️
Prep time
15
minutes
🔥
Cooking time
0
minutes
📊
Calories
120
kcal
Cook Mode
Keep the screen of your device on

Ingredients

  • 2 ripe mangoes, diced
  • 1 red bell pepper, diced
  • 1/2 red onion, finely chopped
  • 1 jalapeno pepper, seeded and minced
  • 1/4 cup fresh cilantro, chopped
  • Juice of 1 lime
  • Salt and pepper to taste

Directions

  1. In a large bowl, combine the diced mangoes, red bell pepper, red onion, jalapeno pepper, and cilantro.
  2. In a separate small bowl, whisk together the lime juice, salt, and pepper.
  3. Pour the dressing over the mango mixture and gently toss to combine.
  4. Allow the flavors to meld together by refrigerating the salsa for at least 30 minutes before serving.
  5. Once chilled, give the salsa a final stir and taste for seasoning. Adjust the salt, pepper, or lime juice if needed.

Nutrition Facts

Calories: 120
Fat: 0.5
Carbohydrates: 30
Protein: 2
Sodium: 300
Fiber: 5
Sugar: 20

Luxurious Homemade Crab and Shrimp Bisque

Introduction

Crab and shrimp bisque is a luxurious and flavorful dish that combines the delicate sweetness of crab meat with the rich and briny flavors of shrimp. This creamy soup is a favorite among seafood lovers and is often served as a special treat during special occasions or elegant dinner parties.

There is something truly indulgent about a homemade bisque. The process of creating this dish from scratch allows you to control the quality and freshness of the ingredients, resulting in a bisque that is far superior to anything you can find in a can or at a restaurant. The combination of tender crab meat, succulent shrimp, aromatic vegetables, and a velvety smooth broth makes this bisque a true culinary masterpiece.

While the preparation of crab and shrimp bisque may seem intimidating, with a little patience and attention to detail, you can easily recreate this restaurant-worthy dish in your own kitchen. In this article, we will walk you through the step-by-step process of making this decadent soup, share some expert tips for success, and provide variations and substitutions to suit your preferences. So put on your apron and get ready to impress your guests with this luxurious homemade crab and shrimp bisque!

Why You’ll Love This Recipe

Luxurious Homemade Crab and Shrimp Bisque

There are several reasons why you will fall in love with this homemade crab and shrimp bisque:

  • It is incredibly rich and creamy, with a velvety smooth texture that is simply irresistible.
  • The combination of crab and shrimp adds a depth of flavor that is both delicate and robust.
  • It is a versatile dish that can be served as a starter or as a main course.
  • It is a great way to impress your guests with a restaurant-quality dish made right in your own kitchen.
  • It can be made ahead of time and reheated, making it a convenient option for entertaining.

Whether you are a seafood lover or simply enjoy indulging in a luxurious and flavorful soup, this homemade crab and shrimp bisque is sure to become a favorite in your culinary repertoire.

Ingredients

To make this luxurious homemade crab and shrimp bisque, you will need the following ingredients:

  • 1 pound of crab meat, preferably lump crab meat
  • 1 pound of shrimp, peeled and deveined
  • 2 tablespoons of butter
  • 1 onion, diced
  • 2 cloves of garlic, minced
  • 2 carrots, diced
  • 2 stalks of celery, diced
  • 4 cups of seafood or vegetable broth
  • 1 cup of heavy cream
  • 1/4 cup of all-purpose flour
  • 1/4 cup of dry sherry (optional)
  • Salt and pepper to taste
  • Fresh parsley for garnish

Feel free to make any ingredient substitutions based on your preferences or dietary restrictions.

Step-by-Step Instructions

Follow these simple steps to make the perfect homemade crab and shrimp bisque:

  1. In a large pot, melt the butter over medium heat. Add the onion, garlic, carrots, and celery. Cook until the vegetables are soft and fragrant.
  2. Add the flour to the pot and stir well to combine. Cook for an additional 2 minutes to cook out the raw flour taste.
  3. Slowly pour in the seafood or vegetable broth, stirring constantly to prevent lumps. Bring the mixture to a simmer and let it cook for about 10 minutes to allow the flavors to meld together.
  4. Add the crab meat and shrimp to the pot. Cook for another 5 minutes, or until the shrimp are pink and cooked through.
  5. Using an immersion blender or a countertop blender, puree the soup until smooth and creamy. If using a countertop blender, work in batches and be careful not to overfill the blender.
  6. Return the soup to the pot and stir in the heavy cream. If using sherry, add it now. Season with salt and pepper to taste.
  7. Simmer the bisque for another 5 minutes to allow the flavors to come together. If the bisque is too thick, you can add more broth or cream to achieve the desired consistency.
  8. Ladle the bisque into bowls and garnish with fresh parsley. Serve hot and enjoy!

Pro Tip: For an extra touch of elegance, you can reserve some lump crab meat and shrimp to garnish the bisque. Simply top each bowl with a few pieces of crab meat and shrimp before serving.

Expert Tips for Success

Here are some expert tips to help you achieve the best results when making homemade crab and shrimp bisque:

  • Use fresh and high-quality seafood for the best flavor. If possible, buy the crab meat and shrimp from a reputable fishmonger.
  • Be careful not to overcook the shrimp. They cook quickly and can become rubbery if cooked for too long.
  • For a thicker bisque, you can add more flour to the roux or simmer the bisque for a longer period of time to allow it to reduce and thicken.
  • If you prefer a spicier bisque, you can add a pinch of cayenne pepper or a few dashes of hot sauce to the soup.

By following these expert tips, you can ensure that your homemade crab and shrimp bisque turns out perfectly every time.

Variations and Substitutions

While this recipe is delicious as is, feel free to get creative and customize it to suit your preferences. Here are some variations and substitutions you can try:

  • Instead of lump crab meat, you can use crab claws or a combination of different types of crab meat.
  • If you don’t have access to fresh seafood, you can use frozen crab meat and shrimp. Just make sure to thaw them thoroughly before using.
  • For a lighter version of the bisque, you can substitute half-and-half or milk for the heavy cream. The bisque will be slightly less rich but still full of flavor.
  • If you’re not a fan of sherry, you can omit it from the recipe or substitute it with white wine.
  • If you prefer a chunkier bisque, you can reserve some of the cooked vegetables and seafood before pureeing the soup. Stir them back into the bisque after blending.

Feel free to experiment with different ingredients and flavors to make this homemade crab and shrimp bisque your own.

Serving Suggestions

Homemade crab and shrimp bisque is a show-stopping dish on its own, but you can enhance the dining experience by serving it with some complementary side dishes and drinks. Here are a few serving suggestions:

  • Crusty bread or garlic bread – Serve slices of warm crusty bread or homemade garlic bread on the side to dip into the bisque.
  • Green salad – A simple green salad with a tangy vinaigrette can provide a refreshing contrast to the rich flavors of the bisque.
  • Chardonnay or Sauvignon Blanc – Pair the bisque with a crisp and citrusy white wine to complement the seafood flavors.

These serving suggestions will elevate your dining experience and make your homemade crab and shrimp bisque the star of the show.

FAQs

Here are some common questions about making homemade crab and shrimp bisque:

Q: Can I use canned crab meat instead of fresh?

A: While fresh crab meat is preferred for the best flavor and texture, you can use canned crab meat if fresh is not available. Just make sure to drain the canned crab meat before using.

Q: Can I freeze the bisque?

A: It is not recommended to freeze the bisque as the texture may change upon thawing. However, you can refrigerate any leftover bisque in an airtight container for up to 3 days.

Q: Can I make the bisque in advance?

A: Yes, you can make the bisque in advance and refrigerate it until ready to serve. Reheat gently on the stovetop, adding more broth or cream if needed to adjust the consistency.

Q: What can I do with leftover bisque?

A: Leftover bisque can be used as a sauce for pasta or served over cooked rice or mashed potatoes. It can also be transformed into a delicious seafood chowder by adding additional seafood and vegetables.

Final Thoughts

Homemade crab and shrimp bisque is a truly indulgent and impressive dish that will elevate any special occasion or dinner party. With its rich and creamy texture, delicate flavors, and luxurious ingredients, this bisque is sure to impress your guests and leave them craving more.

By following the step-by-step instructions, expert tips, and variations provided in this article, you can confidently embark on your culinary journey to create the perfect homemade crab and shrimp bisque. So gather your ingredients, unleash your inner chef, and get ready to savor the decadent flavors of this luxurious soup.

Remember, the secret ingredient to any successful dish is love and passion for cooking. So have fun, enjoy the process, and let your homemade crab and shrimp bisque become a masterpiece that will be remembered for years to come.

Decadent German Chocolate Cake with Irresistible Pudding Filling and Velvety Coconut-Pecan Frosting

Introduction

Picture this: a rich, moist chocolate cake layered with a luscious pudding filling and topped with a velvety coconut-pecan frosting. This is no ordinary cake – it’s a decadent German Chocolate Cake that will leave you craving for more. In this article, we will dive into the world of this irresistible dessert, exploring its history, highlighting its unique flavors, and providing you with a step-by-step guide to recreate this culinary masterpiece in your own kitchen.

Why You’ll Love This Recipe

Decadent German Chocolate Cake with Irresistible Pudding Filling and Velvety Coconut-Pecan Frosting

There are countless reasons why this German Chocolate Cake recipe deserves a special place in your heart and your recipe collection. Firstly, it’s incredibly indulgent, making it the perfect treat for special occasions or simply when you need a little pick-me-up. Secondly, it’s surprisingly easy to make, even for novice bakers, so you don’t need to be a pastry chef to enjoy this delightful cake. Lastly, the combination of the rich chocolate cake, the creamy pudding filling, and the sweet coconut-pecan frosting creates a symphony of flavors that will leave your taste buds dancing with joy.

Ingredients

Here’s a list of the key ingredients you’ll need to make this Decadent German Chocolate Cake:

– 2 cups all-purpose flour

– 2 cups granulated sugar

– 3/4 cup unsweetened cocoa powder

– 1 1/2 teaspoons baking powder

– 1 1/2 teaspoons baking soda

– 1 teaspoon salt

– 2 large eggs

– 1 cup milk

– 1/2 cup vegetable oil

– 2 teaspoons vanilla extract

– 1 cup boiling water

– 1 package instant chocolate pudding mix

– 2 cups milk (for the pudding filling)

– 1 cup unsalted butter

– 1 1/2 cups granulated sugar

– 4 large egg yolks

– 1 teaspoon vanilla extract

– 1 can evaporated milk

– 1 1/2 cups shredded coconut

– 1 1/2 cups chopped pecans

Step-by-Step Instructions

Now that we have our ingredients ready, let’s dive into the step-by-step process of creating this heavenly German Chocolate Cake:

  1. Preheat your oven to 350°F (175°C) and prepare three 9-inch round cake pans by greasing them and lining the bottoms with parchment paper.
  2. In a large mixing bowl, whisk together the flour, sugar, cocoa powder, baking powder, baking soda, and salt until well combined.
  3. Add the eggs, milk, vegetable oil, and vanilla extract to the dry ingredients and mix on medium speed until the batter is smooth and well incorporated.
  4. Reduce the speed to low and carefully pour in the boiling water. Mix until the water is fully incorporated, and the batter becomes thin. Don’t worry; this is normal.
  5. Divide the batter evenly between the prepared cake pans and smooth the tops with a spatula.
  6. Bake in the preheated oven for 30-35 minutes or until a toothpick inserted into the center of the cakes comes out clean.
  7. While the cakes are baking, prepare the pudding filling. In a medium saucepan, combine the instant chocolate pudding mix and milk. Cook over medium heat, stirring constantly, until the mixture thickens and comes to a boil. Remove from heat and let it cool completely.
  8. Once the cakes have cooled, remove them from the pans and place one cake layer on a serving plate or cake stand.
  9. Spread a generous layer of the prepared chocolate pudding filling over the cake layer.
  10. Place the second cake layer on top and repeat the process by spreading another layer of pudding filling.
  11. Finally, place the third cake layer on top and set aside.
  12. To make the coconut-pecan frosting, melt the butter in a saucepan over medium heat.
  13. Add the granulated sugar, egg yolks, vanilla extract, evaporated milk, shredded coconut, and chopped pecans to the saucepan and stir until well combined.
  14. Cook the mixture over medium heat, stirring constantly, until it thickens and reaches a spreadable consistency. Remove from heat and let it cool slightly.
  15. Generously frost the top and sides of the cake with the coconut-pecan frosting, using a spatula to create swirls and peaks for an elegant finish.
  16. Refrigerate the cake for at least 1 hour to allow the flavors to meld together and the frosting to set.
  17. Once chilled, slice and serve this Decadent German Chocolate Cake to your delighted guests or indulge in a generous slice all for yourself.

Expert Tips for Success

Here are a few expert tips to ensure your German Chocolate Cake turns out perfectly:

– Make sure all your ingredients are at room temperature before starting.

– Sift the cocoa powder to remove any lumps and ensure a smooth batter.

– Use high-quality chocolate for the pudding filling and frosting for the best flavor.

– Toast the pecans before adding them to the frosting to enhance their nutty flavor.

Variations and Substitutions

While this traditional German Chocolate Cake recipe is already a crowd-pleaser, you can customize it to suit your preferences or dietary needs:

– For a gluten-free option, substitute the all-purpose flour with a gluten-free flour blend.

– If you’re not a fan of coconut, you can omit it from the frosting or replace it with chopped almonds or walnuts.

– Experiment with different flavor combinations by adding a touch of espresso powder to the cake batter or a splash of rum to the pudding filling.

Serving Suggestions

This Decadent German Chocolate Cake is a showstopper on its own, but you can enhance the experience by serving it with a few thoughtful accompaniments:

– A dollop of freshly whipped cream on the side adds a light and creamy element.

– A scoop of vanilla ice cream complements the richness of the cake and adds a refreshing contrast.

– For a touch of sophistication, serve the cake with a drizzle of warm chocolate ganache and a sprinkle of flaky sea salt.

FAQs

Q: Can I make the cake layers in advance?

A: Absolutely! You can bake the cake layers a day in advance and store them in an airtight container at room temperature. Just make sure they are completely cooled before storing.

Q: Can I freeze the cake?

A: Yes, you can freeze the cake layers before frosting. Wrap each layer tightly in plastic wrap and place them in a freezer bag or airtight container. Thaw them in the refrigerator overnight before assembling the cake.

Q: How long will the cake stay fresh?

A: When stored in an airtight container in the refrigerator, this cake will stay fresh for up to 5 days.

Final Thoughts

Decadent, indulgent, and simply irresistible, this German Chocolate Cake is a true celebration of flavors. From the rich chocolate cake to the creamy pudding filling and the velvety coconut-pecan frosting, every bite is a symphony of textures and tastes. Whether you’re planning a special occasion or simply want to treat yourself to something extraordinary, this recipe is guaranteed to impress. So, don your apron, gather your ingredients, and embark on a delicious baking adventure. Your taste buds will thank you!

Decadent No-Bake Turtle Caramel Pie:

Decadent No-Bake Turtle Caramel Pie

Introduction

Imagine a luscious, creamy dessert that requires no baking and combines the rich flavors of chocolate, caramel, and pecans. That’s exactly what you’ll get with this Decadent No-Bake Turtle Caramel Pie. Whether you’re a seasoned baker or a beginner in the kitchen, this recipe is sure to impress your friends and family with its indulgent taste and stunning presentation.

Originating from the American South, the turtle caramel pie has a long-standing tradition as a beloved dessert during holidays and special occasions. The combination of caramel and pecans pays homage to the classic turtle candy, creating a dessert that is both nostalgic and irresistible.

Decadent No-Bake Turtle Caramel Pie:

Why You’ll Love This Recipe

There are countless reasons why this Decadent No-Bake Turtle Caramel Pie is a must-try. First and foremost, it requires no baking, making it a perfect option for hot summer days when you don’t want to turn on the oven. The preparation is simple and straightforward, allowing you to focus on enjoying the process and the end result.

Another reason to love this recipe is its versatility. Whether you follow a gluten-free or vegetarian diet, you can easily adapt the ingredients to meet your dietary needs. The pie can also be made in advance, saving you time and ensuring that you have a show-stopping dessert ready when you need it.

Ingredients

To make this Decadent No-Bake Turtle Caramel Pie, you’ll need the following ingredients:

  • 1 ½ cups of chocolate cookie crumbs
  • ½ cup of unsalted butter, melted
  • 1 cup of caramel sauce
  • 1 cup of chopped pecans
  • 1 ½ cups of heavy cream
  • 8 ounces of cream cheese, softened
  • ½ cup of powdered sugar
  • 1 teaspoon of vanilla extract
  • Chocolate shavings, for garnish

Step-by-Step Instructions

Follow these simple steps to create your own Decadent No-Bake Turtle Caramel Pie:

  1. In a bowl, combine the chocolate cookie crumbs and melted butter until well mixed. Press the mixture into the bottom of a 9-inch pie dish to form the crust.
  2. Pour the caramel sauce over the crust, spreading it evenly. Sprinkle the chopped pecans on top of the caramel sauce.
  3. In a separate bowl, beat the heavy cream until soft peaks form. In another bowl, beat the cream cheese, powdered sugar, and vanilla extract until smooth and creamy. Gently fold the whipped cream into the cream cheese mixture.
  4. Spoon the cream cheese mixture over the caramel and pecan layer, spreading it evenly. Smooth the top with a spatula.
  5. Refrigerate the pie for at least 4 hours, or overnight if possible, to allow it to set.
  6. Before serving, garnish the pie with chocolate shavings for an extra touch of elegance.

Pro Tip: For easier slicing, dip a sharp knife into hot water before cutting each slice. This will help prevent the pie from sticking to the knife.

Expert Tips for Success

To ensure the best results with your Decadent No-Bake Turtle Caramel Pie, keep the following tips in mind:

  • Use high-quality caramel sauce for the best flavor. Homemade caramel sauce is also an excellent option.
  • For a nuttier flavor, lightly toast the pecans before chopping them.
  • Make sure the cream cheese is softened to room temperature before mixing it with the other ingredients. This will result in a smoother filling.
  • Allow the pie to chill for the recommended time to achieve the perfect consistency. If you’re short on time, you can place it in the freezer for a couple of hours.

Variations and Substitutions

While this Decadent No-Bake Turtle Caramel Pie is already divine as is, you can get creative and customize it to your liking. Here are a few variations and substitutions you can try:

  • Use a different type of cookie for the crust, such as graham crackers or shortbread.
  • Swap the pecans for walnuts or almonds.
  • Add a layer of sliced bananas or strawberries between the crust and caramel for a fruity twist.
  • Drizzle melted chocolate over the top of the pie for an extra chocolatey experience.

Serving Suggestions

This Decadent No-Bake Turtle Caramel Pie is a showstopper on its own, but you can elevate the experience by serving it with a few accompaniments. A dollop of freshly whipped cream or a scoop of vanilla ice cream adds a touch of creaminess to each bite. For a contrasting flavor, sprinkle a pinch of sea salt on top to enhance the caramel and pecan combination.

This pie pairs perfectly with a cup of freshly brewed coffee or a glass of cold milk. The richness of the pie and the warmth of the coffee or the refreshing milk create a delightful balance of flavors.

FAQs

Q: Can I use store-bought caramel sauce instead of making my own?

A: Absolutely! Store-bought caramel sauce works just as well and saves you time in the kitchen.

Q: Can I make this pie ahead of time?

A: Yes! This pie can be made a day in advance and stored in the refrigerator until ready to serve.

Q: Can I freeze this pie?

A: Yes, you can freeze this pie for up to one month. Just make sure to wrap it tightly in plastic wrap or place it in an airtight container before freezing.

Final Thoughts

In conclusion, this Decadent No-Bake Turtle Caramel Pie is the ultimate dessert for any occasion. With its velvety caramel, crunchy pecans, and smooth cream cheese filling, it’s a true delight for the senses. Whether you’re a seasoned baker or a novice in the kitchen, this recipe is sure to impress your guests and leave them craving for more. So go ahead, give it a try, and let the indulgence begin!

Slow-Cooked Ravioli Lasagna

Slow-Cooked Ravioli Lasagna

Introduction

Imagine coming home to the comforting aroma of a delicious Italian lasagna, but without the hassle of layering noodles and sauce. Slow-Cooked Ravioli Lasagna is a game-changer in the world of easy and flavorful weeknight dinners. With just a few simple ingredients and your trusty slow cooker, you can create a mouthwatering dish that will please the whole family.

What sets this recipe apart is the use of ravioli instead of traditional lasagna noodles. The pillowy pockets of cheese-filled pasta provide a delightful twist to the classic dish. Whether you’re a busy parent, a college student with limited cooking skills, or simply someone who loves a hearty and satisfying meal, this Slow-Cooked Ravioli Lasagna is sure to become a favorite in your recipe repertoire.

Slow-Cooked Ravioli Lasagna

Why You’ll Love This Recipe

There are so many reasons to love Slow-Cooked Ravioli Lasagna. Here are just a few:

1. Easy and Convenient: With minimal prep work and the slow cooker doing all the heavy lifting, this recipe is a breeze to make. Simply layer the ingredients and let the slow cooker work its magic while you go about your day.

2. Bursting with Flavor: The slow cooking process allows the flavors to meld together, resulting in a rich and savory lasagna. Each bite is a delightful combination of tender ravioli, gooey cheese, and robust tomato sauce.

3. Versatile and Customizable: While this recipe calls for cheese-filled ravioli, you can easily switch it up with your favorite ravioli variety. Whether you prefer spinach and ricotta or mushroom-filled ravioli, the choice is yours. You can also add extra ingredients like sautéed vegetables or ground meat to make it even heartier.

Ingredients

To make Slow-Cooked Ravioli Lasagna, you will need the following ingredients:

– 1 package (24 ounces) of cheese-filled ravioli

– 2 cups of shredded mozzarella cheese

– 1 jar (24 ounces) of marinara sauce

– 1 cup of ricotta cheese

– 1/4 cup of grated Parmesan cheese

– 1 teaspoon of dried oregano

– 1 teaspoon of dried basil

– Salt and pepper to taste

Optional:

– Sliced fresh basil for garnish

– Crushed red pepper flakes for a spicy kick

Step-by-Step Instructions

1. In your slow cooker, spread a thin layer of marinara sauce on the bottom to prevent sticking.

2. Arrange a single layer of frozen ravioli on top of the sauce.

3. Sprinkle a layer of shredded mozzarella cheese over the ravioli.

4. Spoon dollops of ricotta cheese evenly over the mozzarella layer.

5. Sprinkle grated Parmesan cheese, dried oregano, dried basil, salt, and pepper over the ricotta layer.

6. Repeat the layers until all the ingredients are used, finishing with a layer of marinara sauce and a generous sprinkle of shredded mozzarella on top.

7. Cover the slow cooker and cook on low heat for 4-6 hours or on high heat for 2-3 hours, until the ravioli is tender and the cheese is melted and bubbly.

8. Once cooked, turn off the slow cooker and let the lasagna sit for about 10 minutes before serving.

9. Garnish with fresh basil and crushed red pepper flakes, if desired.

Expert Tips for Success

– Use a slow cooker liner for easy cleanup.

– For a crispier top layer, transfer the cooked lasagna to a baking dish and broil it in the oven for a few minutes.

– Feel free to add extra ingredients like sautéed onions, bell peppers, or ground meat to make the lasagna more substantial.

– Leftovers can be stored in an airtight container in the refrigerator for up to 3 days.

Variations and Substitutions

This recipe is highly customizable, allowing you to tailor it to your preferences. Here are a few variations and substitutions you can try:

– Vegetarian Option: If you prefer a vegetarian lasagna, use vegetable-filled ravioli and skip the meat-based ingredients.

– Gluten-Free Option: Look for gluten-free ravioli to make this recipe suitable for those with gluten intolerance or sensitivity.

– Meat Lover’s Twist: For a meaty version, brown some ground beef or Italian sausage and layer it between the ravioli and cheese.

– Cheesy Delight: Add extra cheese varieties like fontina or provolone for an extra cheesy lasagna.

Serving Suggestions

Slow-Cooked Ravioli Lasagna is a complete meal on its own, but you can elevate the dining experience with these serving suggestions:

– Garlic Bread: Serve the lasagna with a side of warm and crusty garlic bread to mop up the delicious sauce.

– Fresh Salad: Pair the lasagna with a refreshing green salad dressed with balsamic vinaigrette.

– Italian Antipasto Platter: Create an Italian-inspired spread with cured meats, olives, marinated vegetables, and crusty bread.

– Red Wine: Enjoy a glass of your favorite red wine, such as Chianti or Sangiovese, to complement the flavors of the lasagna.

FAQs

Q: Can I use fresh ravioli instead of frozen?

A: Yes, you can use fresh ravioli if you prefer. Adjust the cooking time accordingly, as fresh ravioli typically cooks faster than frozen.

Q: Can I make this recipe in the oven instead of a slow cooker?

A: Absolutely! Layer the ingredients in a baking dish and bake at 375°F (190°C) for about 30-35 minutes, or until the cheese is golden and bubbly.

Q: Can I freeze the leftovers?

A: Yes, you can freeze the leftovers in individual portions for future meals. Thaw in the refrigerator overnight and reheat in the oven or microwave before serving.

Final Thoughts

Slow-Cooked Ravioli Lasagna is a fantastic twist on the classic Italian dish, offering all the flavors and comfort with minimal effort. Let your slow cooker do the work while you tend to other tasks, and soon you’ll be savoring a scrumptious meal that will impress your loved ones. Don’t be surprised if this becomes a go-to recipe in your household, as it’s bound to satisfy even the pickiest eaters. So gather your ingredients, set up your slow cooker, and get ready to enjoy a truly delightful dining experience!

Hearty and Savory Slow Cooker Cowboy Beans

Hearty and Savory Slow Cooker Cowboy Beans

Introduction

There’s something truly comforting about a pot of simmering cowboy beans. The rich flavors, hearty ingredients, and slow cooking process combine to create a dish that warms both the body and the soul. In this recipe, we’ll show you how to make a batch of delicious, savory slow cooker cowboy beans that are sure to become a family favorite. So grab your trusty slow cooker and let’s get started!

Hearty and Savory Slow Cooker Cowboy Beans

Why You’ll Love This Recipe

These slow cooker cowboy beans are not your average side dish. They are packed with flavor, thanks to a combination of smoky bacon, tender beans, and a savory sauce. Here’s why you’ll love this recipe:

  • The slow cooker does all the work for you. Simply set it and forget it!
  • The flavors develop over time, resulting in a rich and complex taste.
  • This recipe is versatile and can be served as a main dish or a side.
  • It’s budget-friendly and can easily be scaled up to feed a crowd.
  • Leftovers taste even better the next day, making it perfect for meal prep.

Ingredients

Before we dive into the cooking process, let’s gather our ingredients. Here’s what you’ll need:

  • 1 pound dried pinto beans
  • 6 cups water
  • 1 onion, diced
  • 4 cloves garlic, minced
  • 4 slices bacon, chopped
  • 1/2 cup ketchup
  • 1/4 cup molasses
  • 2 tablespoons brown sugar
  • 1 tablespoon Worcestershire sauce
  • 1 tablespoon mustard
  • 1 teaspoon chili powder
  • 1/2 teaspoon smoked paprika
  • Salt and pepper to taste

Step-by-Step Instructions

Now that we have our ingredients ready, let’s start cooking! Follow these simple steps to make a delicious batch of slow cooker cowboy beans:

  1. Rinse the pinto beans under cold water and remove any debris. Place the beans in the slow cooker.
  2. In a skillet, cook the bacon over medium heat until crispy. Remove the bacon from the skillet and set aside, leaving the bacon grease in the pan.
  3. Add the diced onion to the skillet and cook until softened, about 5 minutes. Add the minced garlic and cook for an additional minute.
  4. Transfer the onion and garlic mixture to the slow cooker with the beans.
  5. In a small bowl, whisk together the ketchup, molasses, brown sugar, Worcestershire sauce, mustard, chili powder, smoked paprika, salt, and pepper. Pour the sauce over the beans in the slow cooker.
  6. Add enough water to the slow cooker to cover the beans by about an inch.
  7. Cover the slow cooker and cook on low heat for 8-10 hours, or until the beans are tender.
  8. Once the beans are cooked, give them a good stir to combine all the flavors. Taste and adjust the seasoning if needed.
  9. Serve the slow cooker cowboy beans hot with your favorite toppings, such as shredded cheese, sour cream, and green onions.

Expert Tips for Success

Here are some expert tips to ensure your slow cooker cowboy beans turn out perfectly:

  • Soak the pinto beans overnight before cooking to help reduce cooking time.
  • If you prefer a thicker sauce, remove the lid from the slow cooker during the last hour of cooking to allow some of the liquid to evaporate.
  • For a smokier flavor, add a few dashes of liquid smoke to the sauce.
  • Feel free to customize the recipe by adding other ingredients such as diced bell peppers, jalapenos, or even cooked ground beef.
  • Leftover cowboy beans can be stored in the refrigerator for up to 5 days or frozen for longer storage.

Variations and Substitutions

If you’d like to put your own spin on this classic recipe, here are a few variations and substitutions to consider:

  • Instead of pinto beans, you can use kidney beans, black beans, or a combination of beans.
  • If you don’t have bacon on hand, you can substitute with diced ham or smoked sausage.
  • To make the dish vegetarian-friendly, omit the bacon and use vegetable broth instead of water.
  • For a spicier kick, add some chopped jalapenos or a dash of hot sauce.

Serving Suggestions

Slow cooker cowboy beans are a versatile dish that can be enjoyed in various ways. Here are a few serving suggestions to enhance your culinary experience:

  • Serve the beans as a side dish alongside grilled meats, such as barbecued ribs or juicy burgers.
  • Pair them with cornbread or fresh crusty bread for a complete meal.
  • Sprinkle some shredded cheddar cheese on top of the beans and broil until melted and bubbly.
  • For a Tex-Mex twist, serve the beans in tortillas with your favorite toppings, such as guacamole, salsa, and cilantro.
  • Enjoy the beans on their own for a satisfying vegetarian meal.

FAQs

Here are some frequently asked questions about slow cooker cowboy beans:

Can I use canned beans instead of dried beans?

While you can use canned beans in a pinch, the flavor and texture won’t be the same as using dried beans. The slow cooking process allows the flavors to develop and the beans to become tender.

Can I freeze the leftovers?

Absolutely! Slow cooker cowboy beans freeze well and can be stored in an airtight container or freezer bag for up to 3 months. Thaw in the refrigerator overnight before reheating.

Can I make this recipe in an Instant Pot?

Yes, you can adapt this recipe for the Instant Pot. Follow the same steps, but instead of cooking on low heat for 8-10 hours, cook on high pressure for about 45 minutes, followed by a natural release.

Final Thoughts

Slow cooker cowboy beans are a true comfort food that brings together the flavors of smoky bacon, tender beans, and a rich sauce. Whether you’re serving them as a side dish or enjoying them as a main course, this recipe is sure to satisfy your cravings. So grab your slow cooker, gather your ingredients, and get ready to enjoy a hearty and savory meal that will transport you to the wild west!

We hope you give this recipe a try and that it becomes a favorite in your household. Don’t forget to share your experience with us and let us know how you enjoyed these delicious slow cooker cowboy beans. Happy cooking!

Tropical Paradise Cake with Pineapple and Coconut

Tropical Paradise Cake with Pineapple and Coconut

Introduction

Welcome to a tropical paradise of flavors with this delightful cake recipe featuring juicy pineapple and rich coconut! Whether you’re planning a summer gathering, a birthday celebration, or simply craving a taste of the tropics, this cake is sure to transport your taste buds to a sunny beachfront getaway. In this article, we’ll guide you through the step-by-step process of creating this heavenly dessert, providing expert tips and variations along the way. Get ready to embark on a culinary journey to paradise!

Why You’ll Love This Recipe

There are countless reasons why this tropical paradise cake will become your new favorite dessert. First and foremost, it’s incredibly easy to make, even for beginner bakers. The moist and fluffy texture of the cake, combined with the sweet tanginess of the pineapple and the aromatic notes of coconut, create a symphony of flavors that will leave your taste buds dancing with joy. Additionally, this recipe can be easily adapted to suit various dietary preferences, making it a versatile choice for gatherings with friends and family.

Ingredients

Before we dive into the step-by-step instructions, let’s gather all the ingredients you’ll need to create this tropical masterpiece:

  • 2 cups all-purpose flour
  • 2 teaspoons baking powder
  • 1/2 teaspoon salt
  • 1/2 cup unsalted butter, softened
  • 1 cup granulated sugar
  • 3 large eggs
  • 1 teaspoon vanilla extract
  • 1 cup canned crushed pineapple, drained
  • 1/2 cup coconut milk
  • 1/2 cup shredded coconut
  • For the frosting:
  • 1 1/2 cups heavy cream
  • 1/4 cup powdered sugar
  • 1/2 teaspoon coconut extract
  • Additional shredded coconut for garnish

Step-by-Step Instructions

Now that we have all the ingredients ready, let’s dive into the exciting process of creating this tropical paradise cake:

  1. Preheat your oven to 350°F (175°C) and grease a round cake pan.
  2. In a mixing bowl, whisk together the flour, baking powder, and salt. Set aside.
  3. In a separate large bowl, cream together the softened butter and granulated sugar until light and fluffy.
  4. Add the eggs one at a time, beating well after each addition. Stir in the vanilla extract.
  5. Gradually add the dry ingredients to the butter mixture, alternating with the crushed pineapple and coconut milk. Mix until just combined.
  6. Gently fold in the shredded coconut, ensuring it is evenly distributed throughout the batter.
  7. Pour the batter into the prepared cake pan and smooth the top with a spatula.
  8. Bake for 30-35 minutes or until a toothpick inserted into the center comes out clean.
  9. While the cake is cooling, prepare the frosting. In a chilled mixing bowl, beat the heavy cream, powdered sugar, and coconut extract until stiff peaks form.
  10. Once the cake has completely cooled, spread the coconut frosting evenly over the top and sides.
  11. Garnish with additional shredded coconut for an extra touch of tropical flair.

Expert Tips for Success

Creating a perfect tropical paradise cake is a breeze with these expert tips:

– Ensure all ingredients are at room temperature before starting to ensure optimal mixing and baking.

– Use canned crushed pineapple instead of fresh pineapple to ensure consistent moisture throughout the cake.

– For an extra burst of flavor, you can add a teaspoon of rum extract to the batter.

– Toast the shredded coconut before folding it into the batter for an enhanced nutty flavor.

– To achieve a smooth and even frosting, make sure the cake is completely cooled before applying it.

Variations and Substitutions

While this tropical paradise cake is already a crowd-pleaser, you can unleash your creativity and customize it to your liking. Here are a few variations and substitutions you can try:

– Swap the all-purpose flour for a gluten-free flour blend to make the cake gluten-free.

– Add a layer of sliced bananas between the cake layers for a tropical twist.

– Incorporate macadamia nuts into the batter for a delightful crunch.

– For a lighter version, use whipped coconut cream instead of the frosting.

Serving Suggestions

Now that your tropical paradise cake is ready to be enjoyed, here are some serving suggestions to elevate your dessert experience:

– Serve each slice with a dollop of freshly whipped cream and a sprinkle of toasted coconut flakes.

– Pair the cake with a refreshing pineapple or coconut sorbet for a delightful contrast in flavors.

– Accompany each slice with a tropical fruit salad consisting of mango, papaya, and kiwi.

– Serve alongside a chilled glass of pineapple-infused iced tea or a tropical fruit smoothie.

FAQs

Q: Can I use fresh pineapple instead of canned crushed pineapple?

A: While fresh pineapple can be used, it may result in a slightly drier cake. Canned crushed pineapple provides the ideal moisture for this recipe.

Q: Can I make the cake in advance?

A: Yes, you can bake the cake a day in advance and store it in an airtight container at room temperature. Frost the cake just before serving for the best results.

Q: How long does the cake stay fresh?

A: When stored properly in an airtight container in the refrigerator, the cake can stay fresh for up to 3-4 days.

Final Thoughts

Congratulations! You’ve successfully embarked on a culinary journey to a tropical paradise with this pineapple and coconut cake recipe. The combination of tangy pineapple, creamy coconut, and moist cake layers is truly a match made in heaven. We hope this recipe brings a taste of sunshine to your table and creates unforgettable moments with your loved ones. Don’t forget to share your tropical cake adventures with us and happy baking!

Decadent Cheesy Chicken and Bacon Pasta Bake

Introduction

Are you craving a comforting and indulgent meal that combines the irresistible flavors of cheese, chicken, and bacon? Look no further than our Decadent Cheesy Chicken and Bacon Pasta Bake! This mouthwatering dish is perfect for any occasion, whether you’re hosting a family gathering or simply treating yourself to a delicious homemade meal. In this recipe, we’ll guide you through the step-by-step process of creating this cheesy pasta bake that will leave everyone asking for seconds.

Why You’ll Love This Recipe

Decadent Cheesy Chicken and Bacon Pasta Bake

There are plenty of reasons why this Decadent Cheesy Chicken and Bacon Pasta Bake is an absolute winner:

Firstly, it’s incredibly easy to make. With just a few simple steps, you’ll have a hearty and flavorsome dish on the table in no time. Whether you’re an experienced cook or a beginner in the kitchen, this recipe is perfect for all skill levels.

Secondly, the combination of chicken, bacon, and cheese creates a symphony of flavors that will satisfy even the pickiest eaters. The tender chicken, crispy bacon, and gooey melted cheese come together to create a truly indulgent experience.

Lastly, this pasta bake is a versatile dish that can easily be adapted to suit various dietary preferences. You can use gluten-free pasta or opt for a dairy-free cheese alternative without compromising on taste. It’s a recipe that can be enjoyed by everyone at the table.

Ingredients

To make this Decadent Cheesy Chicken and Bacon Pasta Bake, you’ll need the following ingredients:

– 8 ounces of penne pasta

– 2 chicken breasts, cooked and shredded

– 6 strips of bacon, cooked and crumbled

– 1 cup of shredded cheddar cheese

– 1 cup of shredded mozzarella cheese

– 1 cup of milk

– 1/2 cup of chicken broth

– 2 tablespoons of all-purpose flour

– 2 tablespoons of butter

– 2 cloves of garlic, minced

– 1 teaspoon of dried oregano

– 1/2 teaspoon of dried thyme

– Salt and pepper to taste

– Fresh parsley for garnish (optional)

Step-by-Step Instructions

1. Preheat your oven to 375°F (190°C) and grease a baking dish.

2. Cook the penne pasta according to the package instructions until al dente. Drain and set aside.

3. In a large skillet, melt the butter over medium heat. Add the minced garlic and cook for 1-2 minutes until fragrant.

4. Stir in the flour and cook for an additional 1-2 minutes to make a roux.

5. Slowly whisk in the milk and chicken broth until smooth. Cook for 3-4 minutes until the sauce thickens.

6. Add the shredded cheddar cheese and half of the shredded mozzarella cheese to the sauce. Stir until melted and well combined.

7. Season the sauce with dried oregano, dried thyme, salt, and pepper to taste.

8. Add the cooked and shredded chicken, crumbled bacon, and cooked penne pasta to the sauce. Stir until everything is evenly coated.

9. Transfer the mixture to the greased baking dish and sprinkle the remaining mozzarella cheese on top.

10. Cover the dish with foil and bake in the preheated oven for 20 minutes.

11. Remove the foil and bake for an additional 10 minutes until the cheese is golden and bubbly.

12. Remove from the oven and let it cool for a few minutes before serving.

13. Garnish with fresh parsley if desired and enjoy!

Expert Tips for Success

– For extra flavor, marinate the chicken breasts in your favorite seasoning before cooking them.

– To save time, you can use pre-cooked chicken and bacon.

– If you prefer a crispier topping, broil the pasta bake for a few minutes at the end.

– Feel free to add your favorite vegetables to the pasta bake, such as spinach or mushrooms.

Variations and Substitutions

This Decadent Cheesy Chicken and Bacon Pasta Bake is incredibly versatile. Here are a few variations and substitutions you can try:

– Use different types of pasta, such as macaroni or rigatoni, for a fun twist.

– Swap the chicken for cooked ground beef or turkey if you prefer.

– Experiment with different types of cheese, such as Gruyere or pepper jack, to add a unique flavor profile.

– If you’re vegetarian, omit the chicken and bacon and add extra vegetables like roasted red peppers or zucchini.

Serving Suggestions

This Decadent Cheesy Chicken and Bacon Pasta Bake is a complete meal on its own, but you can elevate it even further with some delicious accompaniments:

– Serve with a side salad tossed in a light vinaigrette to add freshness and balance to the meal.

– Pair with a crusty baguette or garlic bread for mopping up the cheesy sauce.

– For a comforting and hearty meal, serve alongside some steamed vegetables like broccoli or green beans.

FAQs

Q: Can I make this pasta bake ahead of time?

A: Absolutely! You can prepare the pasta bake in advance, cover it tightly with foil, and refrigerate for up to 24 hours. When you’re ready to serve, simply bake it according to the instructions.

Q: Can I freeze the leftovers?

A: Yes, you can freeze the leftovers in an airtight container for up to 3 months. Thaw it in the refrigerator overnight and reheat in the oven until heated through.

Q: Can I use a different type of cheese?

A: Of course! Feel free to experiment with different cheeses to suit your taste preferences. Just make sure to choose varieties that melt well.

Final Thoughts

Indulge in the ultimate comfort food experience with our Decadent Cheesy Chicken and Bacon Pasta Bake. This recipe combines the classic flavors of chicken, bacon, and cheese in a way that will leave you craving more. With its easy preparation and endless customization options, this pasta bake is a guaranteed crowd-pleaser. So gather your ingredients, preheat the oven, and get ready to enjoy a truly satisfying meal that will warm your heart and tantalize your taste buds!

Sunshine Citrus Tart:

Introduction

Imagine a sunny summer day, with a gentle breeze rustling through the trees, and the sweet scent of citrus fruits filling the air. Now, imagine capturing that perfect summer day in a delightful dessert – the Sunshine Citrus Tart. This recipe is a burst of sunshine on your taste buds, combining the tangy flavors of citrus fruits with a buttery, crumbly crust. Whether you’re hosting a summer gathering or simply craving a refreshing treat, this Sunshine Citrus Tart is sure to bring a smile to your face.

Why You’ll Love This Recipe

Sunshine Citrus Tart:

There are plenty of reasons why this Sunshine Citrus Tart will become your new favorite dessert. First and foremost, it’s incredibly easy to make. With just a handful of simple ingredients and a few easy steps, you’ll have a stunning tart that looks like it came straight from a patisserie. Secondly, the combination of citrus fruits creates a tantalizing flavor profile. The tartness of lemons and limes balances perfectly with the sweetness of oranges and grapefruits, resulting in a harmonious blend of flavors. Lastly, this tart is not only delicious but also a feast for the eyes. The vibrant colors of the citrus fruits make it a show-stopping centerpiece for any occasion.

Ingredients

To make this Sunshine Citrus Tart, you will need the following ingredients:

  • 1 ½ cups of all-purpose flour
  • ½ cup of unsalted butter, cold and cubed
  • ¼ cup of granulated sugar
  • 2 large eggs
  • 1 tablespoon of lemon zest
  • 1 tablespoon of lime zest
  • 1 tablespoon of orange zest
  • 1 tablespoon of grapefruit zest
  • 1 cup of freshly squeezed citrus juice (lemon, lime, orange, and grapefruit)
  • 1 cup of granulated sugar
  • 4 tablespoons of cornstarch
  • Whipped cream or vanilla ice cream, for serving (optional)

Note: Feel free to experiment with different citrus fruits based on your preference and availability. You can also adjust the sweetness according to your taste.

Step-by-Step Instructions

Follow these simple steps to create your own Sunshine Citrus Tart:

  1. In a large mixing bowl, combine the flour, cold cubed butter, and granulated sugar. Use your fingertips or a pastry cutter to cut the butter into the flour until the mixture resembles coarse crumbs.
  2. Add one beaten egg and the lemon zest to the mixture. Mix until the dough starts to come together.
  3. Gently knead the dough on a lightly floured surface until it forms a smooth ball. Wrap the dough in plastic wrap and refrigerate for at least 30 minutes.
  4. Preheat your oven to 375°F (190°C).
  5. Remove the dough from the refrigerator and roll it out on a lightly floured surface to fit a 9-inch tart pan. Press the dough into the pan, ensuring an even layer on the bottom and sides.
  6. Prick the bottom of the tart shell with a fork to prevent it from puffing up during baking.
  7. Bake the tart shell in the preheated oven for 15-20 minutes or until golden brown. Let it cool completely.
  8. In a medium saucepan, whisk together the citrus juice, granulated sugar, cornstarch, and remaining beaten egg.
  9. Cook the mixture over medium heat, stirring constantly, until it thickens and comes to a boil. Continue cooking for an additional minute.
  10. Remove the saucepan from the heat and pour the citrus filling into the cooled tart shell.
  11. Smooth the filling with a spatula and refrigerate the tart for at least 2 hours to set.
  12. Once chilled and set, garnish the Sunshine Citrus Tart with additional citrus zest or slices.
  13. Serve the tart chilled with a dollop of whipped cream or a scoop of vanilla ice cream, if desired.

Expert Tips for Success

Here are a few expert tips to ensure your Sunshine Citrus Tart turns out perfectly:

  • For a flaky and tender crust, make sure to use cold butter and avoid overmixing the dough.
  • If you don’t have a tart pan, you can use a pie dish or even a rectangular baking dish.
  • To easily remove the tart from the pan, place it on top of a can or jar and let the outer ring fall down.
  • For an extra burst of flavor, consider adding a teaspoon of citrus zest to the whipped cream or ice cream.

Variations and Substitutions

Get creative with your Sunshine Citrus Tart by trying these variations:

  • Add a layer of fresh berries or sliced fruits on top of the citrus filling for added color and taste.
  • Swap the all-purpose flour with almond flour for a gluten-free version.
  • For a tangier tart, increase the amount of lemon and lime zest.

Serving Suggestions

The Sunshine Citrus Tart is a versatile dessert that can be served in various ways:

  • Enjoy it on its own as a refreshing afternoon treat.
  • Serve it as a dessert after a light summer meal.
  • Pair it with a scoop of tangy sorbet for a citrus explosion.
  • Accompany it with a cup of herbal tea or a glass of sparkling lemonade.

FAQs

Q: Can I make the tart crust ahead of time?

A: Absolutely! You can prepare the tart crust a day in advance and keep it refrigerated until ready to use.

Q: Can I freeze the Sunshine Citrus Tart?

A: While the tart can be frozen, it is best enjoyed fresh. The texture of the crust may change slightly after freezing.

Q: Can I use store-bought pie crust instead of making my own?

A: Yes, you can use a store-bought pie crust if you’re short on time. However, homemade crust adds an extra layer of flavor and texture to the tart.

Final Thoughts

Indulge in the bright and zesty flavors of summer with this irresistible Sunshine Citrus Tart. With its buttery crust and tangy citrus filling, every bite is a burst of sunshine. Whether you’re hosting a gathering or simply treating yourself, this tart is sure to impress. So go ahead, gather your favorite citrus fruits, and embark on a culinary journey that will transport you to a sunny paradise.

Try this recipe, and let the Sunshine Citrus Tart bring a taste of summer to your table. Don’t forget to share your experience and spread the joy of this delightful dessert with your loved ones!

Zesty Lemon Bliss Tart

Introduction

Welcome to a blissful journey of flavors with our Zesty Lemon Bliss Tart recipe. If you’re a fan of tangy and refreshing desserts, this is the perfect treat for you. The combination of zesty lemons and a buttery crust creates a delightful explosion in your mouth. Whether you’re hosting a dinner party or simply craving a sweet indulgence, this recipe will surely impress. Let’s dive into the details of this irresistible dessert and learn how to make it from scratch.

Why You’ll Love This Recipe

Zesty Lemon Bliss Tart

There are several reasons why this Zesty Lemon Bliss Tart recipe is a must-try:

1. Easy and Quick: With simple ingredients and straightforward instructions, you can whip up this tart in no time.

2. Bursting with Flavor: The combination of tangy lemons, buttery crust, and a hint of sweetness creates a harmonious balance of flavors.

3. Perfectly Refreshing: The tartness of lemons makes this dessert incredibly refreshing, especially during hot summer days.

4. Versatile and Adaptable: You can easily customize this recipe by adding your favorite toppings or adjusting the sweetness to suit your taste.

Ingredients

To make this Zesty Lemon Bliss Tart, you will need the following ingredients:

– 1 ½ cups all-purpose flour

– ½ cup unsalted butter, cold and cubed

– ¼ cup powdered sugar

– 4-5 lemons, zested and juiced

– 1 cup granulated sugar

– 4 large eggs

– ½ cup heavy cream

– 1 tablespoon cornstarch

– Pinch of salt

Step-by-Step Instructions

Follow these simple steps to create your own Zesty Lemon Bliss Tart:

1. Preheat the oven to 350°F (175°C). Grease a tart pan with butter or non-stick cooking spray.

2. In a food processor, combine the all-purpose flour, cold butter cubes, and powdered sugar. Pulse until the mixture resembles coarse crumbs.

3. Press the crust mixture into the greased tart pan, covering the bottom and sides evenly. Use the back of a spoon to smooth the surface.

4. Place the tart pan in the refrigerator for 15 minutes to firm up the crust.

5. In a mixing bowl, whisk together the lemon zest, lemon juice, granulated sugar, eggs, heavy cream, cornstarch, and salt until well combined.

6. Pour the lemon filling into the chilled tart crust.

7. Bake the tart in the preheated oven for 30-35 minutes or until the filling is set and the crust is golden brown.

8. Remove the tart from the oven and let it cool completely before serving.

Expert Tips for Success

Follow these expert tips to achieve the best results:

– For a more intense lemon flavor, add a few drops of lemon extract to the filling.

– To achieve a crispier crust, blind bake the crust for 10 minutes before adding the filling.

– Make sure to zest the lemons before juicing them to get the maximum flavor.

– If the tart starts browning too quickly, cover it loosely with aluminum foil to prevent over-browning.

Variations and Substitutions

This Zesty Lemon Bliss Tart recipe allows for various creative variations and ingredient substitutions:

– Gluten-Free Version: Substitute the all-purpose flour with gluten-free flour for a gluten-free tart.

– Vegan Version: Replace the eggs with a suitable egg substitute, such as applesauce or flaxseed meal mixed with water.

– Fruit Toppings: Add your favorite fresh berries or sliced fruits on top of the tart for an extra burst of flavor.

Serving Suggestions

Serve this Zesty Lemon Bliss Tart chilled for maximum enjoyment. Here are some serving suggestions:

– Dust the top with powdered sugar for an elegant touch.

– Garnish with fresh mint leaves and a dollop of whipped cream.

– Serve alongside a scoop of vanilla ice cream for a delightful contrast of temperatures.

FAQs

Q: Can I make the tart crust ahead of time?

A: Yes, you can prepare the crust in advance and refrigerate it for up to 24 hours. Just make sure to wrap it tightly in plastic wrap to prevent it from drying out.

Q: Can I freeze the tart?

A: Absolutely! Once the tart is completely cooled, you can wrap it tightly in plastic wrap and aluminum foil before freezing. Thaw it in the refrigerator overnight before serving.

Q: How long will the tart stay fresh?

A: When stored in an airtight container in the refrigerator, the tart will stay fresh for up to 3-4 days.

Final Thoughts

Indulge your taste buds with the zesty and refreshing flavors of our Zesty Lemon Bliss Tart. This recipe combines the perfect balance of tanginess and sweetness in a buttery crust, creating a truly blissful dessert experience. Get creative with your toppings and serve it alongside your favorite accompaniments for an unforgettable treat. Don’t miss out on this delightful dessert – give it a try and let us know how it turns out!