Apple Cheddar Galette with Honey and Thyme Recipe
Discover how to craft a delightful apple cheddar galette with honey and thyme. This easy recipe blends sweet apples, sharp cheddar, and aromatic thyme-infu

Discover how to craft a delightful apple cheddar galette with honey and thyme. This easy recipe blends sweet apples, sharp cheddar, and aromatic thyme-infu

Discover the art of creating delectable buttery piping cookies with this easy recipe guide. Perfect for both novice and seasoned bakers, unleash your creat

Learn how to make delightful and visually stunning Christmas pinwheel cookies with this easy recipe. Perfect for the holidays, vegan, gluten-free, and cust

Discover the perfect blend of tropical flavors and heat with an easy coconut shrimp & sweet chili sauce recipe. Indulge in a guilt-free, gluten-free deligh

Discover the secrets to creating the perfect creamy clam dip with garlic and parsley, a versatile and crowd-pleasing recipe that will elevate your gatherin

Elevate your holiday gatherings with a delightful twist – Christmas Cookie Dough Dip! Explore this easy recipe for a festive treat that captures the spirit

Discover the art of creating old-fashioned butter mints with this nostalgic recipe. Infuse tradition with sweetness in every bite.

Discover how to make homemade peppermint patties with this easy recipe. Vegan and gluten-free, these DIY treats are a healthier alternative to store-bought
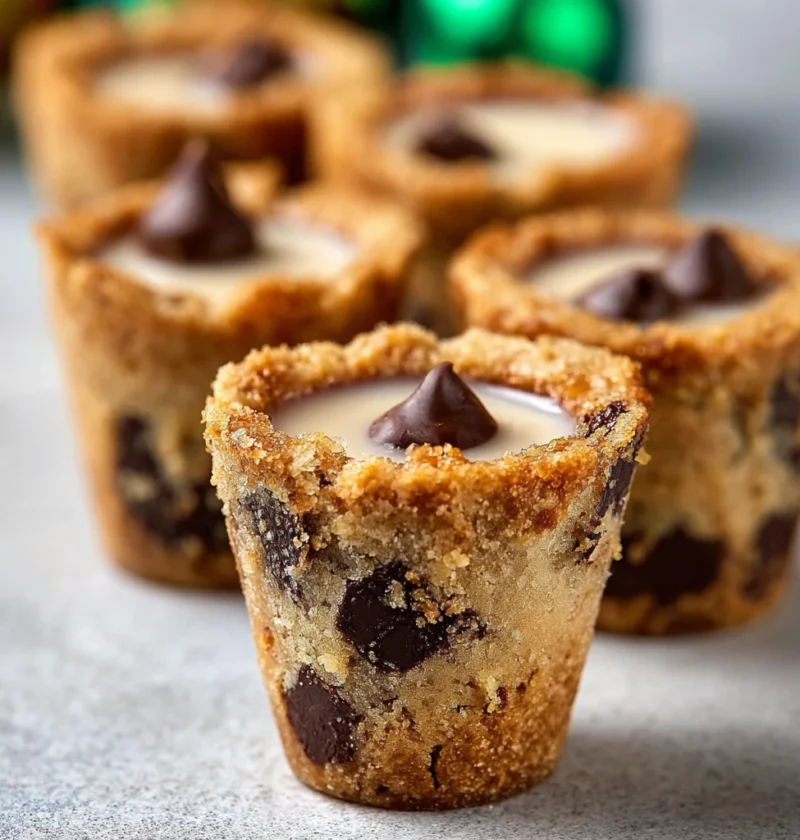
Learn to make Chocolate Chip Cookie Shots – a fun fusion of cookies and party hacks! Perfect for gatherings, with dietary preferences catered to.
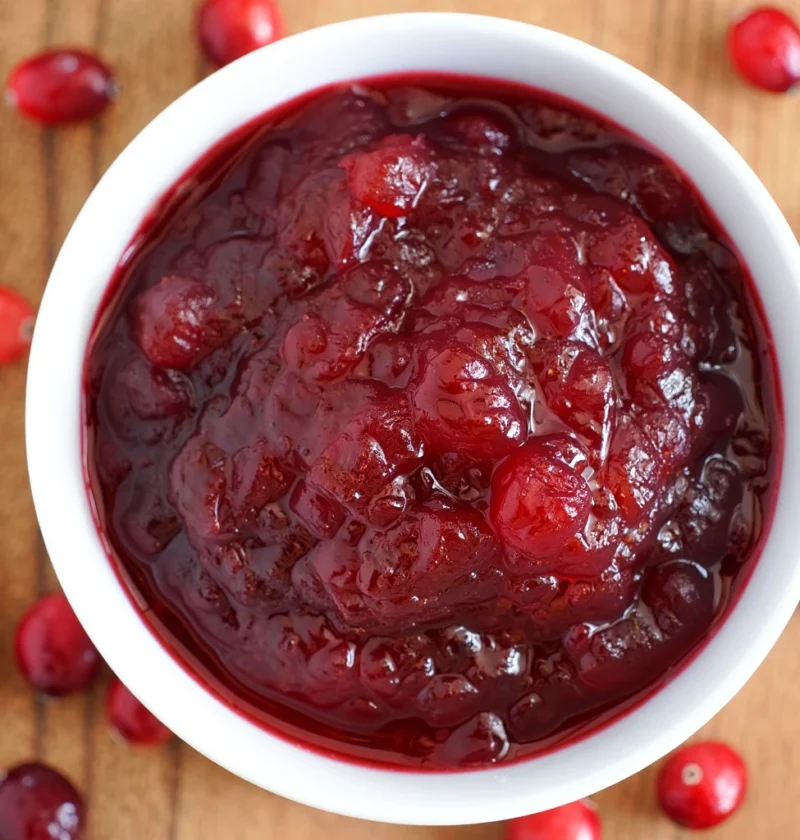
Discover the magic of creating your own easy homemade cranberry sauce recipe for Thanksgiving, bursting with sweet and tangy flavors.