Sugared Cranberries Recipe
Discover the perfect balance of sweet and tart flavors with this delightful sugared cranberries recipe. Elevate any occasion with this easy and versatile t

Discover the perfect balance of sweet and tart flavors with this delightful sugared cranberries recipe. Elevate any occasion with this easy and versatile t

Discover the art of crafting a delightful Sparkling Cran Grape Punch recipe, blending the richness of cranberries and grapes for a refreshing and festive b

Delight in a versatile and nutritious Potato and Green Bean Salad with Hard-Boiled Eggs. Discover a harmonious blend of flavors in this simple, satisfying.

Indulge in the rich flavors of Roasted Poblano & Fresh Corn Creamy Chowder recipe – a celebration of Mexican cuisine’s vibrancy and traditional techniques.

Discover the art of Andes Cool Whip Candy – a delightful fusion of Andes mints and whipped candy. Create a sweet sensory experience with this easy recipe.

Indulge in the rich flavors of pecan pie with these easy-to-make no bake pecan pie balls. Perfect for quick desserts or holiday snacks – no oven required!

Create bakery-worthy red velvet cinnamon rolls at home with this ultimate guide. Discover the secrets to perfecting these decadent treats and indulge your.
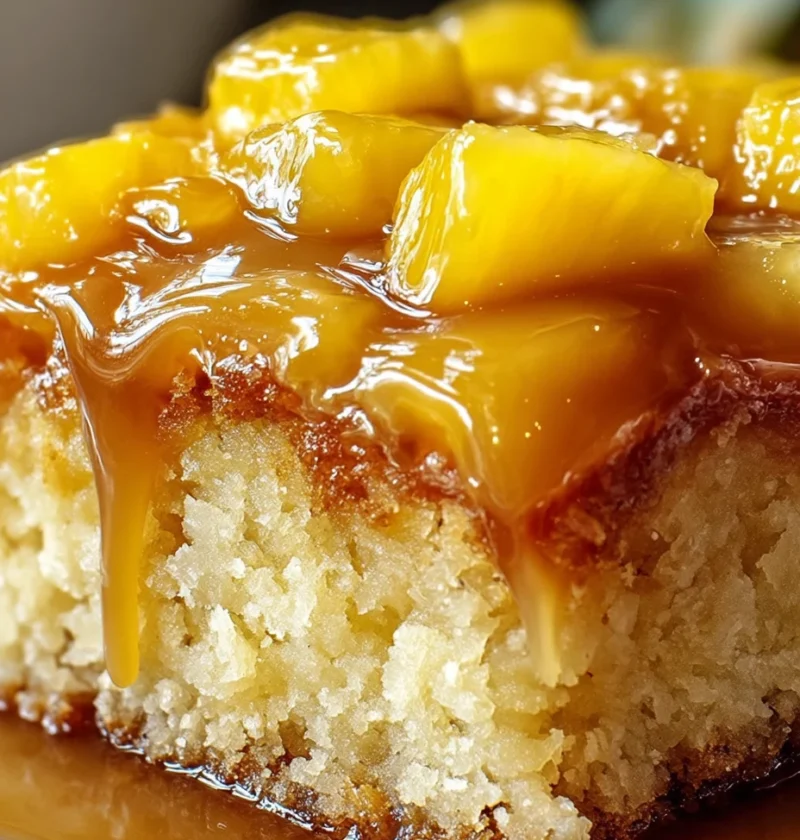
Indulge in a slice of tropical paradise with this easy, flavorful pineapple heaven cake recipe. Perfect for any occasion, this dessert is a crowd-pleaser t

Learn how to make fluffy buttermilk beignets with this easy recipe. Enjoy the crispy outside and soft inside of these Southern treats.
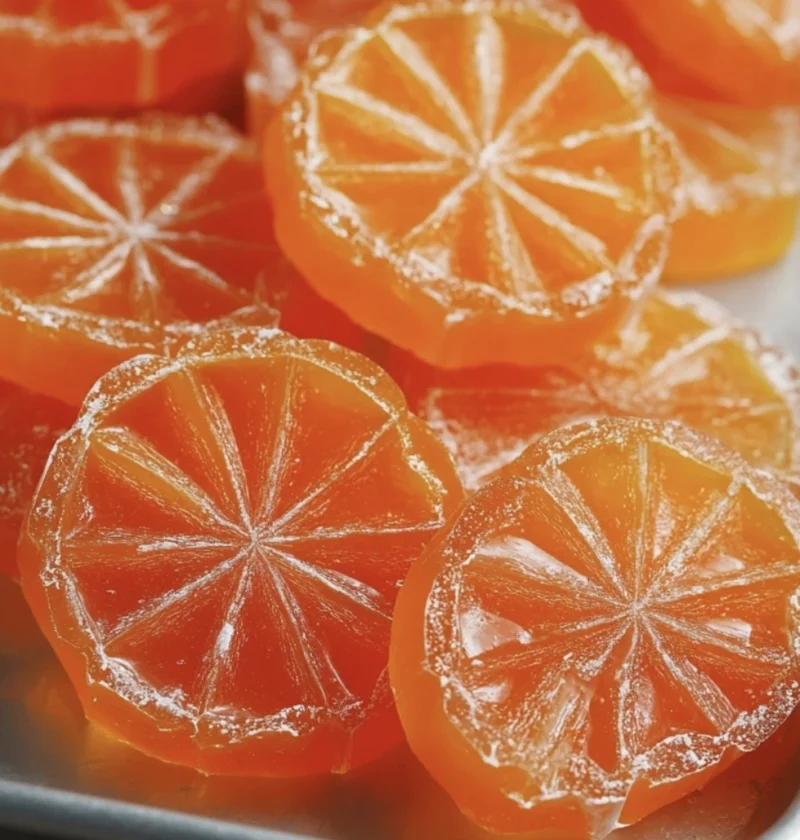
Learn how to make classic homemade orange candy with this delightful recipe. Capture the essence of citrus goodness in every bite and customize the flavor.