Crispy Golden Parmesan Potato Bites Ingredients
Discover how to make crispy golden Parmesan potato bites, a delightful recipe marrying Parmesan cheese with potatoes for a crispy, cheesy treat.
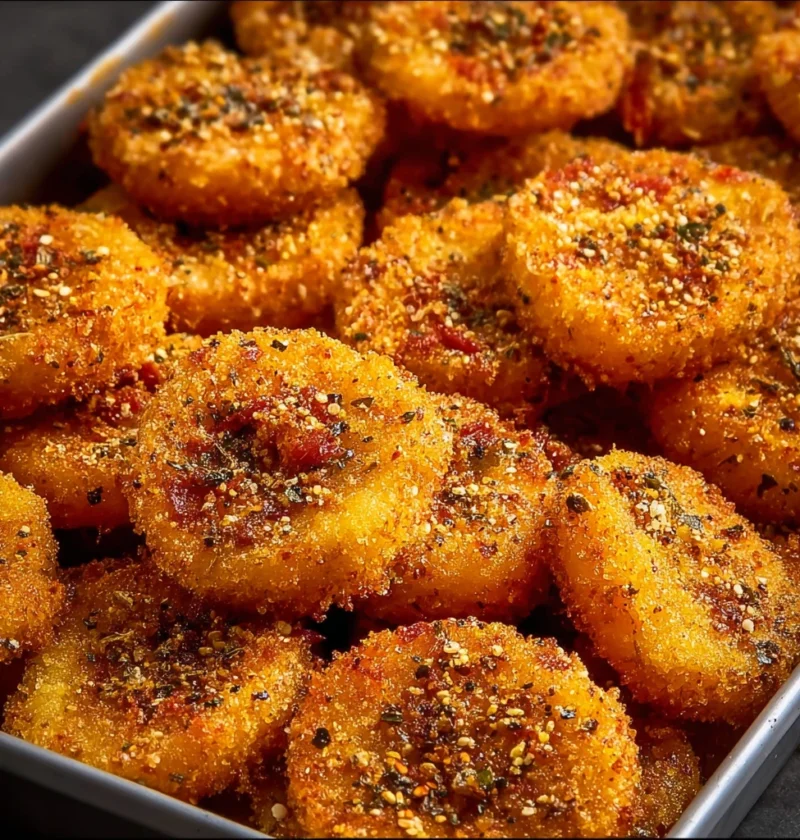
Discover how to make crispy golden Parmesan potato bites, a delightful recipe marrying Parmesan cheese with potatoes for a crispy, cheesy treat.
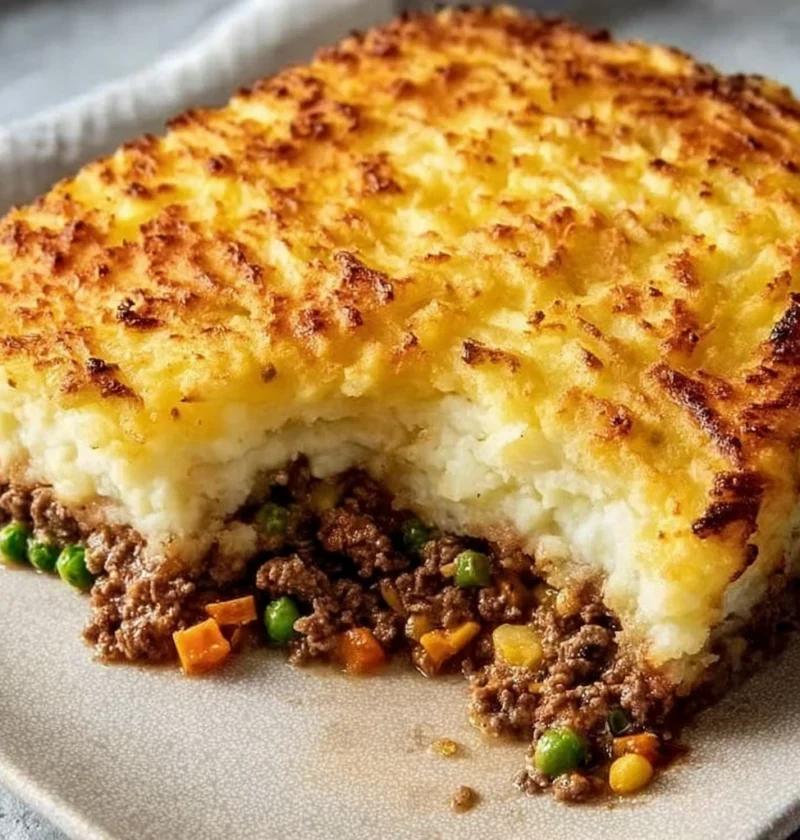
Discover the history, significance, and secrets behind Shepherd’s Pie—a classic comfort food that brings families together with savory meat and creamy ma
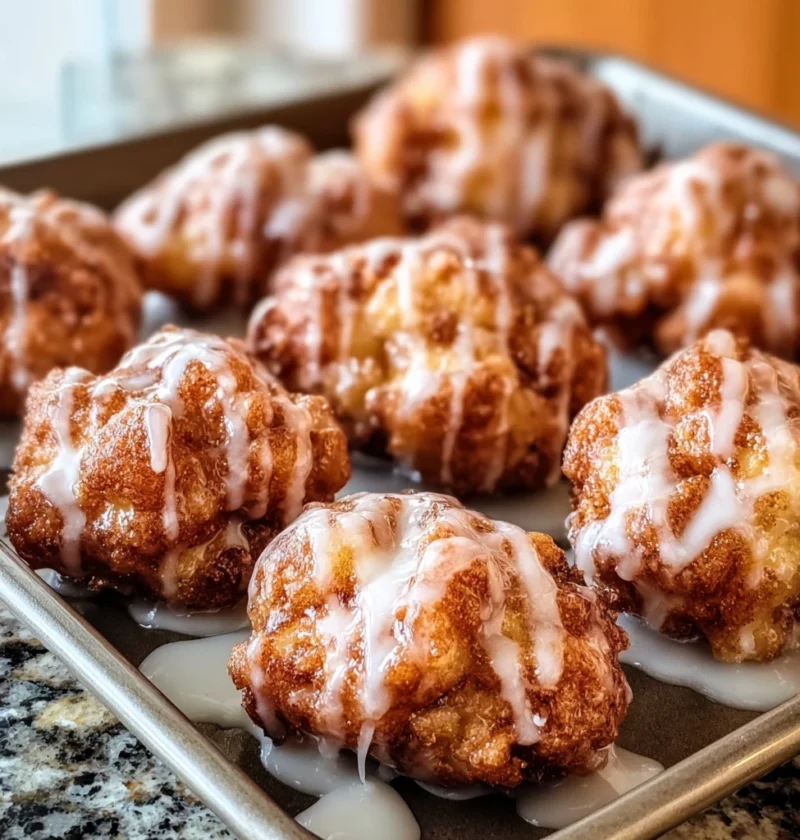
Discover the nostalgia and warmth of Baked Apple Fritters – a cherished pastry recipe that blends fruity sweetness with comforting indulgence.
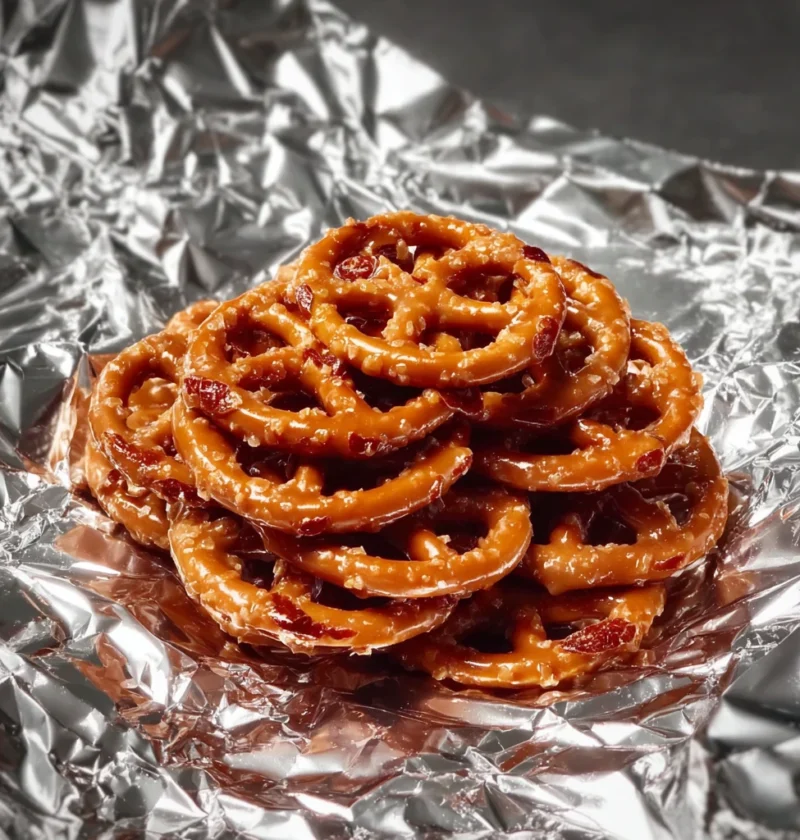
Discover the irresistible combination of sweet and salty flavors in Butter Toffee Pretzels. Perfect for parties or a quick snack, this recipe is a crowd-pl
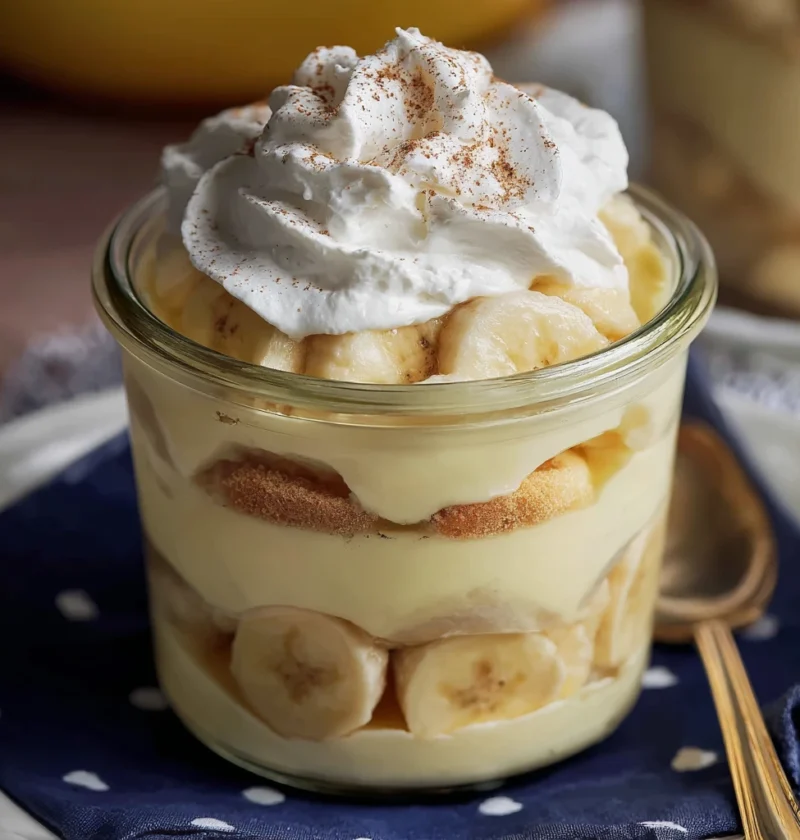
Discover the secrets to making the best homemade banana pudding – a delightful dish loved by all ages. From simple ingredients to expert tips, create a cre
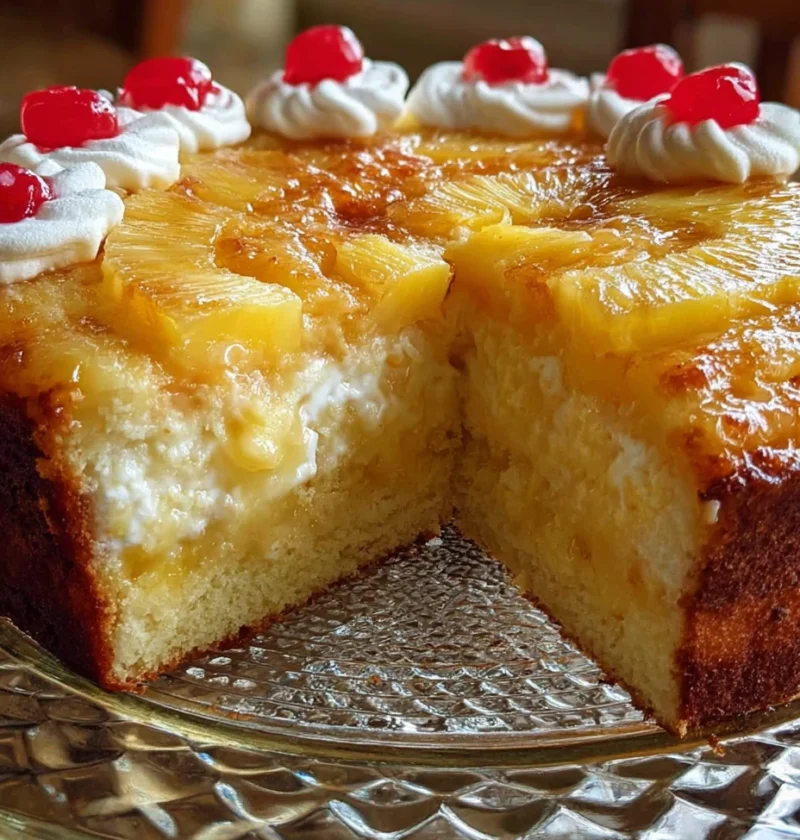
Indulge in the tropical bliss of Juicy Pineapple Heaven Cake! Easy to make, versatile, and crowd-pleasing. Discover the secrets and step-by-step instructio
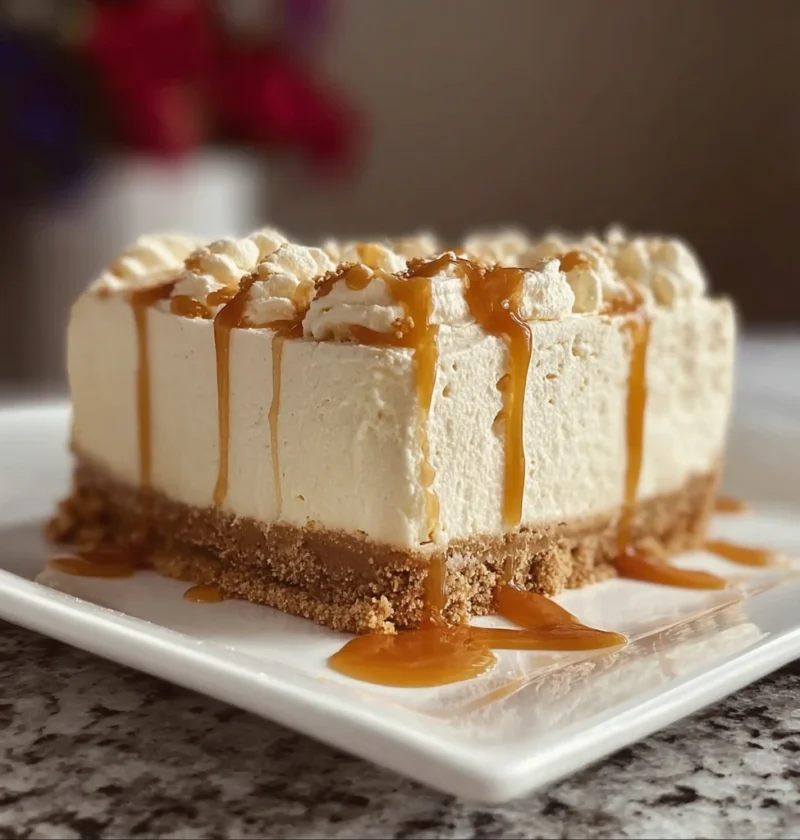
Discover the joy of making a velvety no-bake cheesecake with this easy recipe. Perfect for any occasion, this creamy dessert is a crowd-pleaser!
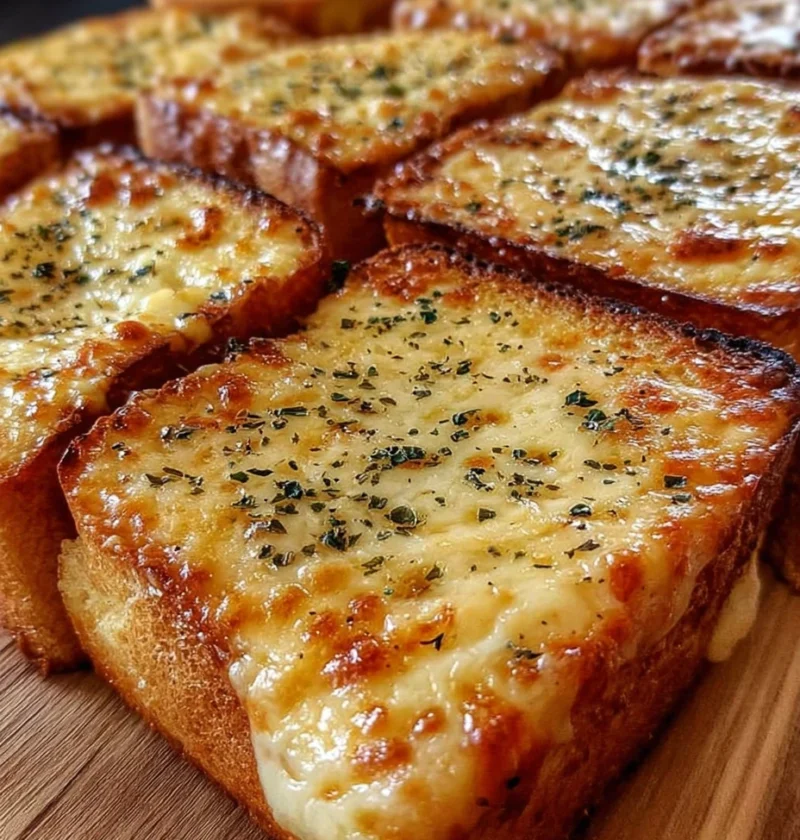
Learn how to create the ultimate cheesy garlic bread toasts with this simple recipe. Elevate basic ingredients into a culinary masterpiece with expert tips
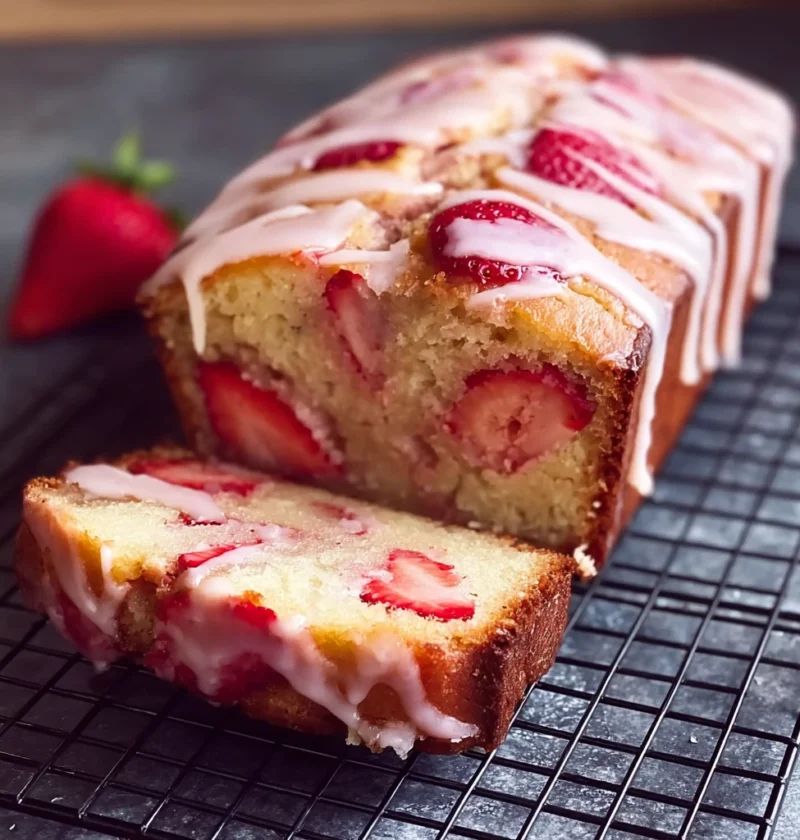
Indulge in the delightful world of baking with a Strawberry Glazed Pound Cake Loaf, a moist and buttery treat bursting with fresh strawberry flavors and to
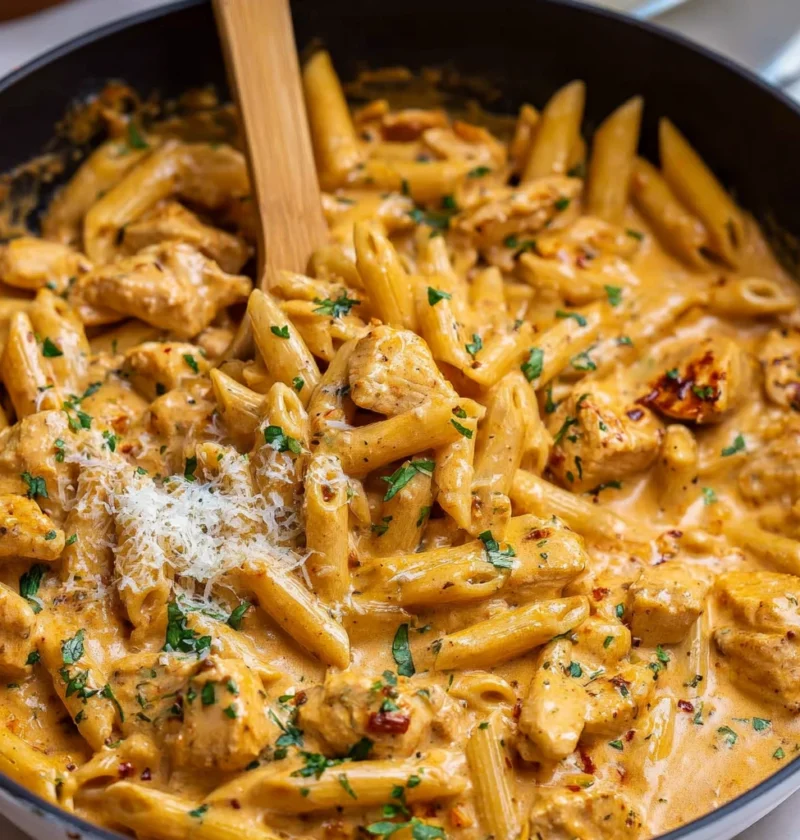
Discover the magic of One Pan Marry Me Chicken Pasta: a fusion of Italian-inspired pasta and savory chicken cooked in a delectable sauce, creating a sympho